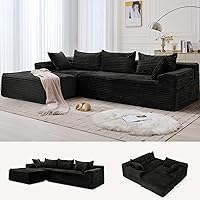
How to Connect a Sectional Couch
To connect a sectional couch together, align and engage its built-in brackets, or fit compatible connectors to a suitable frame. Check mounting space, screw depth, and floor clearance before installing added hardware.
On this page (8 sections)
- How do you connect a sectional couch together?
- What should you measure before buying connectors?
- Which connector suits your sofa and cleaning routine?
- How do you install screw-in sectional clips?
- Why won’t the brackets line up or stay connected?
- How do you clean and care for connected sections?
- Should every sectional piece be connected?
- How should you choose your sectional connection method?
To connect a sectional couch together, align and engage its built-in brackets, or install compatible connectors on a suitable frame. Start underneath the sofa, where you can check the hardware, mounting space, and clearance before making holes.
Connectors hold separate sofa frames together. If only the cushions slide while the bases stay still, frame connectors won’t solve that problem.
How do you connect a sectional couch together?
Use existing sofa hardware first, following the sofa brand’s joining instructions. Replacement clips are an option when the couch has suitable mounting points and no usable original connection.
- Clear the floor and place each section near its final position.
- Inspect the meeting edges and undersides for hooks, plates, or brackets.
- Identify which parts mate and how they engage.
- Bring the sections level, then slide, lower, or push them together as directed.
- Check that the join holds and all legs rest on the floor.
If original hardware is bent, loose, or missing, ask the sofa brand about a matching replacement before adding a different design. Don’t stack incompatible connectors at the same join.
Our sectional sofa guide explains common configurations. For pieces designed to move between layouts, read what makes a sectional modular.
How to connect sectional couch pieces without forcing them
Line up the frames and connector halves, rather than judging alignment by the cushions. Soft arms and cushions can touch before the hardware beneath them reaches its mating position.
Move slowly and keep fingers away from the closing gap. Stop if one section rises, a leg lifts, or metal catches against upholstery.
What should you measure before buying connectors?
Measure solid mounting space, frame thickness, and floor clearance on both sides of each join. A bracket that fits one module may have nowhere suitable to attach on the next.
Look for structural wood rather than assuming every surface beneath the sofa can hold screws. Thin bottom panels, dust-cover fabric, and foam aren’t substitutes for a load-bearing frame.
Record the usable mounting width and depth, then check the proposed screw path. A screw must grip suitable material without emerging through the other side or reaching wiring, springs, or moving parts.
Count the joins you need to secure, then check how each pack defines a piece, connector, or set. Two mating halves can form one connection, so package counts alone don’t tell you how many joins you can complete.
If you’re still choosing the sofa itself, our guide to buying a sectional couch covers layout and access decisions worth settling before assembly.
Which connector suits your sofa and cleaning routine?
Choose by frame fit and mounting access, then consider adjustment and release. More metal or more notches won’t compensate for an unsuitable attachment point.
HOWDIA: for compatible frames with adjustable joins
HOWDIA suits regular split sofas with accessible wooden load-bearing frames at least 1.5 cm thick. Its 3 mm steel construction and adjustable engagement make it worth considering when the mounting distance needs some adjustment.
Skip it for fabric-only bases, narrow frame edges, or integrated sofas without split gaps. HOWDIA gives conflicting guidance about L-shaped sectionals, so get shape-specific confirmation before choosing it for that layout.
Its lift-to-release design also suits households that separate modules for vacuuming or cover removal. Make sure you can safely lift the relevant section in its normal room position.
UPVONT: for bottom mounting beneath cushioned sides
UPVONT is a useful choice when side cushioning makes an edge-mounted connection awkward. It mounts beneath the sofa and needs at least 1 in of clearance below the bottom frame, plus room for the brackets.
Skip it if the frame sits too low or you can’t reach structural wood. Its lift-to-release connection suits frequent cleaning, provided the section is manageable to lift and realign.
ANTFEES: for several planned connections
ANTFEES suits a project with several compatible joins to secure. Its brackets measure 2.95 x 2.6 in, so check the available flat mounting area before choosing this pack.
Skip it where the frame offers only a narrow strip of wood. ANTFEES gives conflicting screw lengths of 0.8 in and 1 in, so verify the supplied screws against the frame depth before installation.
The brackets engage vertically. Allow room to make that joining motion rather than planning a layout where surrounding furniture blocks access.
Yfzeok: for joins needing a wider adjustment range
Yfzeok suits bottom-mounted connections where adjustment range matters. Yfzeok specifies a 1 to 5.3 in adjustment range; check how that range applies to your mounting positions before buying.
Skip these clamps for metal-only frames, floor-hugging bases, or fabric skirting that blocks access. They attach with screws initially, while the later release works by lifting the section.
Don’t use the adjustment range to preserve an unwanted gap between seats. Position the sofa as intended, then select the engagement point that holds that layout.
How do you install screw-in sectional clips?
Mount clips to approved structural points, with both halves positioned to engage without twisting the frames. Set the layout and check the fit before driving any screws.
Keep the sofa instructions and connector instructions nearby. Have a tape measure, pencil, and the tools those instructions specify, plus help for moving bulky sections.
- Separate the modules and identify the matching bracket halves.
- Position them on suitable frame surfaces in the required orientation.
- Measure and mark the mounting holes on both sections.
- Check bracket clearance, screw length, and the space behind each hole.
- Make pilot holes if directed, then fasten the brackets as instructed.
- Return the modules upright and engage the connection slowly.
Support any tilted section securely. Don’t work beneath a module someone is merely holding up.
Tighten screws enough to seat the bracket firmly without crushing the wood or stripping the hole. If a screw spins without gripping, stop and resolve the attachment problem before joining the sofa.
Why won’t the brackets line up or stay connected?
Check orientation, height, and mounting position before applying more force. A connector can look close to aligned while one half is facing the wrong way or sitting too high.
Confirm that each module belongs in that position and that all legs are properly attached. A leg caught on a rug edge can change the height enough to prevent engagement.
For adjustable clips, use the permitted notch positions rather than bending teeth or hammering parts together. If upholstery bunches between the brackets, separate the pieces and check the mounting location.
Common mistakes include fastening only one side firmly, mounting into thin panels, and dragging the entire sofa by one connected module. Move sections separately when the instructions require it.
Once joined, check the seam and apply gentle pressure to each base. Recheck the hardware after the first few uses, especially if you notice a widening gap, rocking, or a new noise.
How do you clean and care for connected sections?
Release the connection before moving modules apart for cleaning. Pulling against engaged hardware can strain the screws and mounting wood.
HOWDIA, UPVONT, and Yfzeok separate by lifting a section. Follow the release direction and get help when the module is too heavy or awkward to control.
Vacuum crumbs from the seam and clear debris around exposed brackets while the pieces are apart. UPVONT specifies wiping its hardware with a dry cloth; keep upholstery cleaner away from the connection.
Inspect for loose screws, bent parts, or cracked mounting wood before reconnecting. Address damage rather than tightening the join harder to hide movement.
For movement between cleaning sessions, read how to keep a sectional couch together. Our guide to separating a sectional couch covers moving the pieces apart.
Should every sectional piece be connected?
Connect the modules designed to join in your chosen layout. Leave a piece freestanding only when the sofa brand allows that use.
Corner units, chaises, and sleeper sections may have different mounting points or joining motions. Check each connection separately and confirm that added hardware won’t block a moving mechanism.
Settle the room layout before making permanent holes. Use our guide to arranging a sectional sofa for placement and sectional sofa dimensions to check room fit and walking space.
How should you choose your sectional connection method?
The best way to connect a sectional couch together is to match the hardware to the frame and layout. Keep working built-in connectors, or seek matching replacements when original parts are missing.
Choose HOWDIA for compatible split wooden frames needing adjustable engagement, UPVONT for bottom access beneath cushioned sides, ANTFEES for several planned joins, or Yfzeok when its adjustment range suits your mounting positions.
Skip screw-in clips if you can’t confirm suitable structural mounting points. Once the connection fits correctly, use our guide to keeping sectional pieces together to address any remaining movement.
Frequently asked questions
How do you connect sectional couch pieces?
Connect sectional couch pieces by aligning and engaging their built-in hooks, plates, or brackets according to the sofa instructions. If hardware is missing, seek a matching replacement first.
Add screw-in connectors only when the frame and mounting space suit them, then check that the joined sections sit level and remain secure.
Can you connect a sectional without drilling?
Yes, a sectional with working built-in connectors can usually join without adding holes. The screw-in connectors covered here need screws for initial installation, even when their release mechanism works without tools.
If you want to avoid changing the frame, ask the sofa brand about compatible replacement hardware before choosing another method.
Where should sectional connectors go?
Sectional connectors belong on the structural mounting points specified by the sofa and connector instructions. Bottom-mounted designs need accessible frame space beneath both sections.
Before fastening anything, check that the mating parts can meet at the same height without hitting legs, pulling upholstery, or blocking a reclining or sleeper mechanism.
How do you separate a sectional after connecting it?
Separate a sectional using its connector’s release motion, rather than pulling the pieces sideways. HOWDIA, UPVONT, and Yfzeok use lift-to-release connections.
Clear the surrounding floor and get help supporting heavy modules, then move the released section far enough away that the hardware cannot catch again.